Tomorrow I will be talking with my house about bread. Actually, that was the purpose of this blog, to get me prepared, but I haven't really utilized it as well as I had hoped, but I'm really enjoying this blog and learning new things all the time. I'm having one of my friends take some pictures and I'll post more about what I said and what we did soon. My friend, Vincenzo, will want to edit the photos before he gives them to me, lol.
Anyway, thank you for taking this journey with me. I can't imagine stopping this blog, right now. Many more posts to come, especially since I juts made a new kind of bread today, Portuguese Sweet Bread, which of course I will post about later. Right now, I need to go to bed. I'm up in about 5 hours so, sleep well!
With Bread,
~Chad
Thursday, May 12, 2011
Friday, April 29, 2011
Love for Liberia
 Last year in June I went to Liberia to help with a school that gives good education to the less fortunate. Over there the fortunate are just about par with our homeless in dear old Seattle, or perhaps less so, then the less fortunate are in pretty bad shape. In 2003 they had just gotten out of a 14 year civil war that devastated
  EVERYTHING! In power was a corrupt warmonger by the name of Charles Taylor, the second person EVER to be charged with war crimes while still in office. There was indiscriminate missile fire from all sides, taking down buildings filled with innocent bystanders. Only recently has travel been opened up between us and Liberia again.
Wh
 ile I was there I was able to bring art to kids who haven't had much exposure to it. The war stopped pretty much all production of any thing artistic and destroyed so much. A lot of their culture was lost and many don't even remember the names of certain rivers anymore and have no way of finding out what they were. The sketchbook I brought, however, had more of their drawing than mine. :) I got to spend some time in the kitchen helping to cook dinner, too.
I fell in love with the people there. They taught me so much. It was difficult to leave and I could talk about these guys forever, but that's not this blog. BUT on June 4th there is a fundraiser for the organization that I went with, Serve the Children, based in Gig Harbor, WA. They're holding a dessert auction and last year one dessert went for $2000! I cried so hard. Anyway, I'm going to make a Bread Basket filled with different breads for the auction. I'm darned excited. So, in the upcoming weeks before the auction, I'm going to be practicing with the basket making process and coming up with the cont
 ents as well. I'm so FREAKING EXCITED! Send prayers and inspiration my way.
With bread,
~Chad
Monday, April 18, 2011
Bread Day - April 16

 On Saturday my friend Natalia and I hosted our monthly Bread Day. We started this in January, inviting our friends over to make bread with each other and enjoy the fruits (?) of our labor. Natalia and I experiment on a new kind of bread each event. Nat made a Rosemary Olive bread using whole wheat flour. It had a few issues rising for a while, but after a bit of futzing, it decided it was time to start doing it's job.

We had 6 doughs being made at once so the kitchen was indeed full. 4 Challah, 1 Wheat Bread with a few alterations made by my cousin Jaclyn, and Natalia's Rosemary Olive.

 Noelle (right) is a newcomer to bread making and she joined in the Challah fray with the rest of the bunch. Tammy and Noelle made some beautiful 3 strand braids.
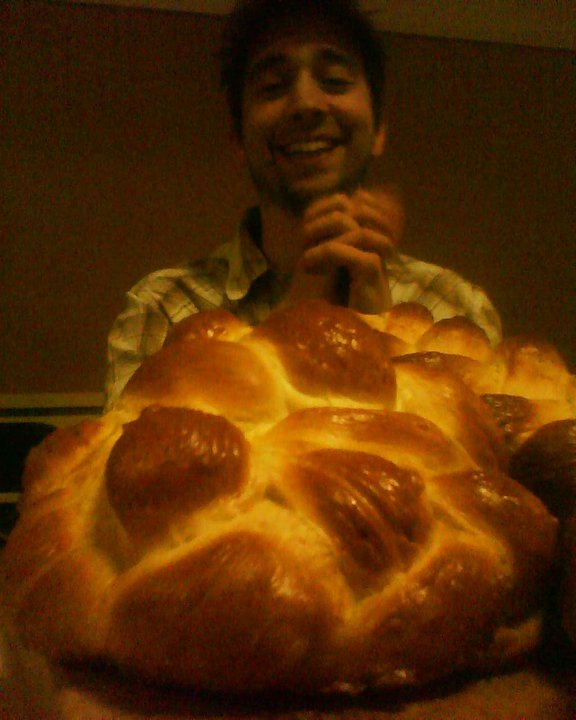
Devin made his braid into a wreath and it turned out really cool. Scott made. . .a tumor. He calls it his :"bee hive". Whatever it is, it is a mass.

 What is bread without it being broken over some food? Sadly enough the bread wasn't ready by dinner time, but as it is another tradition on bread day, we eat. Natalia made Pesto Chicken Wheels paired with Penne pasta with some more pesto and salad. I wasn't able to make any
 bread that day, sadly, but I made a
  Ginger Creme Brulee with a Lime Sauce. Pretty good, but the ginger wasn't strong enough.
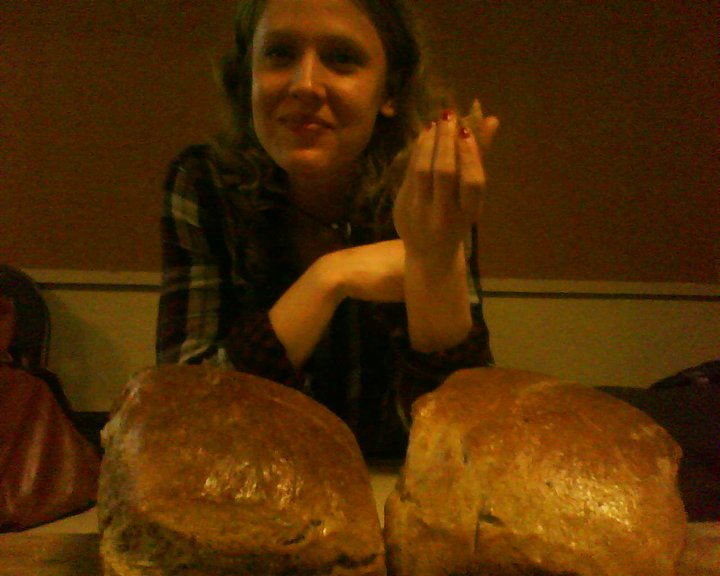
Bread days hold so much excitement here. It's amazing how we can make something so basic to life. Bread is such a blessing.
With bread,
~Chad
Thursday, April 7, 2011
Bread Day - Anadama Bread
 Today wasn't a scheduled bread day, but it turned into one anyway. At my house on Thursdays we have communal dinners. We have groups that take turns cooking and cleaning. This quarter, because most of the people here go to the University of Washington, we're "traveling around the U.S." in foods. Last quarter we went around the world and got to try a bunch of different styles of cooking. AWESOME! Today we visited the New England region. I know what you're thinking, because everyone elses responses went a little like this, "*GASP* Are we having New England Clam Chowder!?!?!" No, we did not have New England Clam Chowder. Our budget doesn't cover seafood often. So we had American Goulash, Succotash, and Roasted Potatoes. Where this ties in to this blog is the bread I made for it. I made Anadama Bread. LOVE! Again, thank you allrecipes.com.
ANADAMA BREAD
Origins: This is a true bread of the United States. There is a little discrepancy on the true origins of it, but the one I like the best is this - way back when in Rockport, Massachusetts a woman left her husband in a flurry and the man was livid furius, not only for leaving him, but she had the nerve to only leave behind a pot of cormeal mush and some molasses for dinner. He threw together those two along with some yeast and flour all the while exclaiming, "Anna, Damn 'er!", which was later changed to Anadama, to be a little less offensive.
Characteristics: Depends on your molasses. Peter Reinhart mentions in his book, The Bread Baker's Apprentice, that the molasses drives the flavor because of how strong it is. People testing his recipe preferred Brer Rabbit Golden Molasses because of its lightness. "Molasses is high in iron and other minerals, but some brands are harsher and darker." He advises to get lighter, more refined brands, unless a more intense flavor is preferred. I do prefer the darker, more rich taste.
Difficulty: Easy
Time: 2 1/2 hours Total; 20 minutes Prep; 100 minutes Rising; 30 minutes Cooking
1/2 cup water
1/4 cup cornmeal
2 tbsp butter
1/2 cup molasses
2 1/4 tsp active dry yeast
1/2 cup warm water (110 F)

3 cups all-purpose flour (I used bread flour)
1 tsp salt
Bring water and cornmeal to a boil in a small saucepan. Stir occasionally and cook until it thickens, about 5 minutes. Remove from heat and add the butter and molasses then let cool to lukewarm.
In a large mixing
 bowl, dissolve the yeast in the warm water and let sit for about 10 minutes. Combine the two mixtures then add 2 cups of the flour and salt. Add the remaining flour 1/2 cup at a time, mixing thoroughly each addition. Knead on a floured surface until smooth and elastic, about 8 minutes.
Lightly oil a large bowl, place the dough in the bowl and turn to coat. Cover the bowl with plastic wrap or a damp towel and let sit for an hour.
 Punch down the dough and form into a loaf. Either place in a bread pan or place on a cookie sheet with a little corn meal. Let rise for 40 minutes.
Bake at 375 F (190 C) for 30 minutes or until the top is a darker brown and when tapped, the bottom sounds hollow.
RESULT

AMAZING! I got so many compliments on this bread. One friend said it was the best bread I've made yet, whether this is true or not is debatable, but man-o-man, it was tasty.
With bread,
~Chad
Monday, April 4, 2011
Bread Day - Rye
I have a friend who is intolerant/allergic to wheat gluten and I always feel bad because she doesn't get to have bread often and if she does she suffers for it. I wanted to make a bread that she can enjoy, so this is my search for today, a good wheat free rye bread. Apparently rye bread using straight rye flour is hard to find in cookbooks. Thank God for allrecipes.com. The reviews were varied. The people who didn't like the recipe had certain dietary needs going in and were expecting a result equal to regular bread. Rye is not wheat.
STUFF:
2 cups milk
2 2/3 tsp dry active yeast
2 tbsp molasses
1 egg (I used 3)
7 1/2 cups rye flour
1 tbsp salt
2 tbsp caraway seeds
Heat the milk in a sauce pan until it bubbles, then remove from heat and let cool to a lukewarm temperature. Add the yeast and let sit for 10 minutes until milk thickens. (I didn't quite understand that part. My milk didn't thicken.)

In a large mixing bowl, mix the yeasty milk with the molasses then combine with eggs, 4 cups of the flour, salt and seeds. (I used flax seeds because I couldn't find my caraway and I wanted some extra fiber in it, though if you want the true rye flavor, go with caraway.) The mixture will look like soft cookie dough. Cover with a damp towel and let rise for 45 minutes.
Stir in the remaining flour 1/2 cup at a time making sure the dough is mixed thoroughly after each addition. Turn out the dough onto a floured surface and knead until smooth and elastic, about 8 minutes. Lightly coat a large bowl with oil and turn the dough around inside of it until greased. Cover with a damp towel and let rise for 1 hour or until doubled in size.
Punch down the dough and separate into 2 lumps. Place each into their own greased bread pan and press down until flat on top and the dough meets the sides and corners. Cover with the damp towel and let sit for 40 minutes or until it has doubled in size. (I sprayed a mist of water on the top and pressed down some more flax seeds on top.)
Bake at 350 degrees F for 30 minutes. The top should be golden brown and should sound hollow when the bottom is tapped.
RESULT
Let it sit for a little bit before slicing, then dig in.
With bread,
~Chad
STUFF:
2 cups milk
2 2/3 tsp dry active yeast
2 tbsp molasses
1 egg (I used 3)
7 1/2 cups rye flour
1 tbsp salt
2 tbsp caraway seeds
Heat the milk in a sauce pan until it bubbles, then remove from heat and let cool to a lukewarm temperature. Add the yeast and let sit for 10 minutes until milk thickens. (I didn't quite understand that part. My milk didn't thicken.)

In a large mixing bowl, mix the yeasty milk with the molasses then combine with eggs, 4 cups of the flour, salt and seeds. (I used flax seeds because I couldn't find my caraway and I wanted some extra fiber in it, though if you want the true rye flavor, go with caraway.) The mixture will look like soft cookie dough. Cover with a damp towel and let rise for 45 minutes.
Stir in the remaining flour 1/2 cup at a time making sure the dough is mixed thoroughly after each addition. Turn out the dough onto a floured surface and knead until smooth and elastic, about 8 minutes. Lightly coat a large bowl with oil and turn the dough around inside of it until greased. Cover with a damp towel and let rise for 1 hour or until doubled in size.
I look back at my saying how Rye is not Wheat. Boy, am I right. Kneading this dough is like kneading a large lump of playdough without the salty smell. Partially, this frustrated me because it was completely new and didn't work the way I wanted it to, but it doesn't have the wheat gluten which keeps it together like the regular doughs, which is the point of making this rye bread, so my complaining is kept in check.
Punch down the dough and separate into 2 lumps. Place each into their own greased bread pan and press down until flat on top and the dough meets the sides and corners. Cover with the damp towel and let sit for 40 minutes or until it has doubled in size. (I sprayed a mist of water on the top and pressed down some more flax seeds on top.)
Bake at 350 degrees F for 30 minutes. The top should be golden brown and should sound hollow when the bottom is tapped.
RESULT

My bread came out super dense and didn't really rise that much. Maybe I killed my yeast with too hot of milk or rye just doesn't contain the gas that the yeast produces. The consistency of the dough would support that theory. I suppose the eggs I added to the recipe didn't help with the fluffiness either. It still tastes good. I think the only improvement would be to work it enough to create bonds in the dough to hold in the gas from the yeast.
Let it sit for a little bit before slicing, then dig in.
With bread,
~Chad
Monday, March 28, 2011
Bread Day - Challah
 I got to go visit back home this last week and see my new niece for the first time. She's SO SMALL! While I was at my parents I made Challah, and my other sister-in-law was really excited. She really likes bread and certainly had her fill. She's got a baby comin' in a little over a month. Pretty excited for that one, too. Anyway, being home I had access to Dad's camera, which is one hekuva step up from my cell phone, so I got some nicer pictures this time.
 This picture came from the book Baking Artisan Bread, you'll find more on the book in the labels.
CHALLAH
Origins: This is a Jewish ceremonial bread used to celebrate the Sabbath. The braids in the traditionally separated the bread into 12 sections that represented the 12 tribes of Israel. Characteristics: Braided, light, fluffy.
Difficulty: Easy
Time: 4 1/2 hrs total Prep 10 - 15 minutes; Fermenting, shaping and proofing 3 1/2 hrs; 20 - 35 minutes baking.
 4 cups unbleached bread flour
2 Tbsp sugar
1 tsp salt
1 1/3 tsp instant yeast
2 Tbsp vegetable oil
2 large eggs, slightly beaten
2 large egg yolks, slightly beaten
3/4 cup + 2 Tbsp water, room temp.
2 egg whites, whisked until frothy
Sesame or poppy seeds for garnish
 Bowl 1: Combine flour, sugar, salt and yeast. Bowl 2: Whisk oil, eggs, egg yolks and water. Pour mixture from bowl 2 into bowl 1 and mix with a spoon until everything forms a ball. (I just start kneading when I get tired of mixing, and the ball only really forms when you're using an electric mixer.) Add more water if you need to.
  Knead the dough on a flour dusted surface for about 10 minutes. The dough should be soft and supple, but not sticky, common theme in bread dough. When properly kneaded it should pass the windowpane test. Form into a boule (ball) place in an oiled bowl, coating the dough thoroughly. Cover the bowl with plastic wrap and let it ferment at room temperature for an hour.
Take out the dough, knead for about 2 minutes to degas. Re-form the dough into a boule and replace it into the bowl, covering with plastic wrap to again ferment for another hour.

It should grow to at least 1 1/2 its size. Divide the dough into 2 parts, one 1/3 the size and the other 2/3. Divide each again into 3 parts. Form each piece into a boule and cover them
 with a towel to sit for 10 minutes. Take the large boules and roll each into a strand, fatter in the middle and tapered off at the ends (mine didn't do that so well. I'm not so great at that yet). Braid the strands together. Do the same to the smaller boules and place on top of the larger braid. Press d
 own lightly to make them attach, it does only so much, but it's better than nothing.
Line a baking sheet with baking parchment and place the braided loaf onto the sheet. Brush the loaf with the egg wash the spray with oil. Cover with plastic wrap loose enough for the dough to rise 1 1/2 times larger. Allow about an hour to do so.

Have the oven ready at 325 F with the oven rack on the mid shelf. Brush with the egg wash again and sprinkle with sesame seeds. Bake for 20 minutes, rotate 180 degrees and bake for another 20 to 45 minutes. By the way, the loaf gets HUGE! The bread should get to a lovely golden brown. Just to make sure, insert a thermometer. It should read 190 F.
Transfer to a cooling rack and let cool for an hour before consuming. (That's part of the recipe. I disagree. Bread, especially this one, should be eaten warm, and oh it is so good.)


With bread,
~Chad
Sunday, March 20, 2011
Bread Day - Barbari
Ok, so it's been a while since I last posted, I did have a bread day last week and I made Barbari, and bread native to Iran. They're little flat buns with a few slashes in them.
I had some trouble with this recipe. I want to blame the book, but it could have just been me, haha. Anyway, after adding the water to the flour mixture, it just seemed like too little, so I added another cup. This is where my frustration started. I got all of the water mixed in with the flour, but it was all clumpy. UGH! I decided to let it rest and rise so it would be easier to work with. Once I came back I kneaded it like was supposed to be done before. In the end it worked out. The taste wasn't that amazing but I really think that's because I wasn't able to work with it enough so it's true character wasn't found. Never-the-less, they disappeared quickly in my house full off people.

SO! Here's the recipe and my edits, . . . or edit.
BARBARI
Origins: Iran/Persia. It's called Barbari because of who originally made it, the Barbars, a group of people in Persia. Genius! In restaurants it's served with a cheese similar to Feta, Tabriz.
Characteristics: Small, flat and ovular with 2 slashes diagonal. Traditionally, this bread is much larger and thinner, kind of like a thin pizza crust, its slashes going lengthwise as opposed to diagonal. Not sure how it's supposed to taste.
Difficulty: Easy
Time: 2 1/2 hours
Prep; 20 minutes, rising; 1 1/2 hrs, baking; 30 minutes

This is the first recipe used from this book, Classic Breads. I forgot to take a bunch of pictures on this one. I took a few, but not enough.
STUFF
4 cups + 1 1/3 oz all-purpose flour
2Tbsp fresh yeast or 2 1/2 tsp dry yeast
1 tsp sugar
1 cup + 2 1/4 oz lukewarm water (I go with straight 2 cups, maybe a little more)
3 1/2 tsp salt
2 Tbsp extra-virgin olive oil
Sift the flour into a large bowl and carve out a well in the center. Dissolve the yeast and sugar in the water then pour into the well. Now you get a little dirty, swish your fingertips in the water and add flour from the sides until it becomes a creamy mixture. Cover the bowl with plastic wrap.
After about 15 minutes, remove the plastic and mix in the rest of the flour along with the salt. Knead the dough thoroughly and form into a boule (ball). It should not get sticky.
In another bowl, pour in the olive oil. Place the dough in the oil and swirl it around until it is evenly covered. Again, cover with plastic wrap. Set aside to rise for 40 minutes.
Take the dough out and put it on your work surface. Divide it into 12 equal portions and shape into ovals. Flatten the dough and slash diagonally twice. Grease with oil, cover with a towel and let rise again for another 30 minutes.
Preheat over for 425. Place the little guys in the oven for 20-30 minutes.
Addition: If you like, half way through baking, take out the buns and brush with oil or water and sprinkle on either caraway or sesame seeds and let them finish baking.
With bread,
~Chad
Monday, March 7, 2011
Bread Day - Ciabatta
 CIABATTA
Origins: It comes from beautiful Italia, though there is much dispute where in Italy it truly was born. When translated its name means slipper, referring to its shape described as somewhat elongated, broad and flattish and, like a slipper.
Characteristics: The crust is crisp and strong, surrounding a soft, porous inside.
Difficulty: Med - Hard.
I just read that this is a bad bread to start out with for beginners. Oops. I guess we'll see how we do.
Time: Day 1, 2-4 hours (poolish/biga)
Day 2, 1hr de-chill poolish/biga; 10-15min mixing; 3-4hrs fermenting, shaping & proofing: 20-30min baking.

I'm using a recipe from "The Bread Baker's Apprentice" to make the Ciabatta. This book has two versions of the recipe, one made with Poolish and one made with Biga. Both of these are fermented dough, just done a little differently. I'm going to start with the Poolish version.
DAY 1 - Monday
POOLISH - normal recipe
2 1/2 cups unbleached bread flour
1 1/2 cups water, room temp
1/4 tsp instant yeast
Mix a
 ll ingredients thoroughly until there is no dry flour left. The texture or the dough should be like super thick pancake batter. Cover bowl with plastic wrap and let sit at room temperature for 3-4 hrs or until the sponge becomes bubbly and foamy. Refrigerated. It will keep for up to 3 days.
Note: The recipe for the ciabatta requires 3 1/4 cups of the poolish, so I added another cup of flour and matched it with enough water to make it the right texture, about 3/4 cup.Also, since I'm using Active Dry Yeast, witch isn't as aggressive as Instant, I used a total of about 2 tsp. We'll see how this goes.
DAY 2 - Tuesday
Right now my bread is in the oven with 3 minutes to go. WOOHOOOO!
I started by taking out the poolish from the day before and letting it sit for an hour to take off the chill. In another bowl mix:
3 cups of flour
1 3/4tsp salt
1 1/2tsp of yeast.
Add the 3 1/4cups of poolish and mix it all together adding 6Tbsp of water. Make sure everything is mixed thoroughly.
Dipping your hand in cold water every once in a while, scoop under the dough and lift it up, stretching it and pressing back down on the other side all the while rotating the bowl with the other hand mimicking a bread hook. Switch the direction a couple times. Continue kneading until 7 minutes is up.
Turn out onto a floured surface and pat it into a square about 8" x 8". Take a hole of the left corners, stretch out and up to fold over about 3/4 of the way over, do the same with the other corners. Spray with water or oil, dust with flour and cover with saran wrap. Let sit for 30 minutes
Fold, spray, flour and cover again. Let sit for 1 1/2 - 2hrs. Trying as much as possible to not degas the dough, cut it into 2 or 3 equal pieces. Place on a liberally floured towel and fold into rectangle shapes 6" long. Bunch up the towel to make walls in between the lumps. Flour liberally and cover with a towel. Let rest for 45-60 minutes.
Preheat over to 500 and place a heavy duty pan or cast iron skillet on the top rack in the oven.
Turn dough over onto a pan dusted with corn meal. Place in oven. Pour 1 cup of hot water into skillet. Close oven. Spray oven with water 3 times in 30 second intervals. This simulates the steam injection bread oven. After the last spray turn heat down to 450 and cook for 10 minutes. Rotate and bake another 10 minutes or until done. Inside temperature of bread should be 205.
My results
Crust, kinda crispy. Inside, spongy. Tastes good. It has a taste unlike the breads I normally make, which in the bread world are on the sweeter side. Though it took a good chunk of time, this is a bread I truly love. I can't wait to try it again and make it better.
With bread,
~Chad
Monday, February 28, 2011
Postponed Bread Day
Well, looks like it wasn't in the cards for today to be the first Bread Day. Woke up this morning barely being able to move. Hopefully it's just a 24hr bug, but we'll see. For now, I must see if I have enough energy to muster to go get some juice from the store. Have a blessed day.
With bread,
~Chad
ADDENDUM 3/4/11-
I'm feeling a lot better now, so I'll be coming back to posting again and making bread. Glad to be back, even though I'm only 5 posts in. :)
With bread,
~Chad
ADDENDUM 3/4/11-
I'm feeling a lot better now, so I'll be coming back to posting again and making bread. Glad to be back, even though I'm only 5 posts in. :)
Sunday, February 27, 2011
Wheat Bread
This is the recipe my Dad taught me that started my love of bread. When I teach people how to make bread I always start them with this. I had a friend who moved out of state so I wrote down these instructions so she could remember how to make it. It's easy but oh so rewarding. This recipe makes 2 loaves. Each loaf costs about $3 to make with all of the ingredients and for the quality of bread you get that's about $2 cheaper than in the stores.
INGREDIENTS:
2 Cups - Warm Water (125-150 degrees)
3 Tbsp - Honey
1.5 Tbsp - Dry Yeast
3 Cups - Wheat Bread Flour
3 Cups - White Bread Flour
1/4 Cup (Half a Stick) - Butter; Melted
2 Tsp - Salt
3 Tbsp - Brown Sugar
1. Combine water, honey and yeast in a large mixing bowl. Stir to dissolve honey. Let sit for 5-10 minutes. There should be no dry yeast left. Yeast will become foamy.
2. Add 1 cup of the wheat flour and 1 cup of the white flour. Mix well.
3. Add melted butter and salt. Mix well.
4. Continue adding flour alternating between wheat and white, scraping the sides as you go. With your last cup of wheat flour, mix in the brown sugar. You probably won't use all of the white flour. This is ok, the most important thing is making sure the wheat is mixed in.
5. Once dough is thoroughly mixed and pulls away from the sides of the bowl, place it on a flat surface with flour sprinkled on it. Sprinkle some flour on top of the dough and begin kneading. Continue kneading dough adding flour from the table until dough no longer sticks to your hands, 10-15 minutes.
6. Place dough ball into a bowl covered with a damp towel and let rise until size doubles. About 40 minutes to an hour.
7. Punch down and form into a ball. 8. Separate ball into equal halves and place into greased bread pans. Dough should be flat and fit into the corners.
9. Again let rise with damp towel covering and let size double.
10. Place pans into oven preheated to 375 degrees. Bake for 40 minutes.
11. Remove bread from pans and lightly thump the bottom. There should be a hollow sound. Let cool completely before storage. (Overnight is ok)
NOTE: You can add more nutrition by adding things like ground nuts or seeds to the mix. You can even replace the water with warm milk to add a little flavor and make the bread smoother. Something my Mom discovered is that you can make it fluffier by adding eggs. So, before you add too much flour, put in one or two well beaten eggs into the mixture. Enjoy the experiments.
With bread,
~Chad
Friday, February 25, 2011
Books and Bread Days
BOOKS
 I was in Portland last weekend and got a couple bread books from Powell's, a dream of a store. One was "The Secrets of Jesuit Breadmaking" by Brother Rick Curry, S.J., a book with a lot of history in it, which really excites me. It contains stories and quotes of Jesuit Brothers from centuries ago, along with the more recent. The recipes also follow the Liturgical Calendar, celebrating the Christian holidays.
The other I forgot and it's not in front of me, but it's old and talks a lot more about muffins and pancakes than bread, but it was $5. I'm not complaining.

Today, though, I bought 3 more books. These are great. "Classic Breads" by Manuela Caldirola and friends has recipes that represent different countries and are mostly rustic artisan breads, but all beautiful. Lots of goodness for $13.

"Baking Artisan Bread" by Ciril Hitz is great for instruction. Partly because it has a "bonus" DVD. There are things you just can't learn from a book. The DVD is great for a visual instruction. My dream would be to learn from someone directly, but for now, this will do. Bonus included, $25 is worth it.

Last, "The Bread Baker's Apprentice" by Peter Reinhart is terrific. It doesn't get to the recipes until page 104. All the pages before that are packed with information. Where most books give one or two pages to technique and ingredients, this book has a chapter devoted to it, making sure to fully inform you of what to use and why, without being snobby. A little steep for my budget, but $35 is not bad for its size and length of information.
From these books I look for the knowledge and wisdom of the great breadmakers that have come before me. I shall document all interactions with them as they come.
BREAD DAYS
Every Monday will be devoted to either a new recipe or the perfection of a technique. I hope that by writing about my experiences, what I have learned will solidify and it will keep me accountable. So, here it goes. On February 28, I start my official journey with bread.
With bread,
~Chad
 I was in Portland last weekend and got a couple bread books from Powell's, a dream of a store. One was "The Secrets of Jesuit Breadmaking" by Brother Rick Curry, S.J., a book with a lot of history in it, which really excites me. It contains stories and quotes of Jesuit Brothers from centuries ago, along with the more recent. The recipes also follow the Liturgical Calendar, celebrating the Christian holidays.
The other I forgot and it's not in front of me, but it's old and talks a lot more about muffins and pancakes than bread, but it was $5. I'm not complaining.

Today, though, I bought 3 more books. These are great. "Classic Breads" by Manuela Caldirola and friends has recipes that represent different countries and are mostly rustic artisan breads, but all beautiful. Lots of goodness for $13.

"Baking Artisan Bread" by Ciril Hitz is great for instruction. Partly because it has a "bonus" DVD. There are things you just can't learn from a book. The DVD is great for a visual instruction. My dream would be to learn from someone directly, but for now, this will do. Bonus included, $25 is worth it.
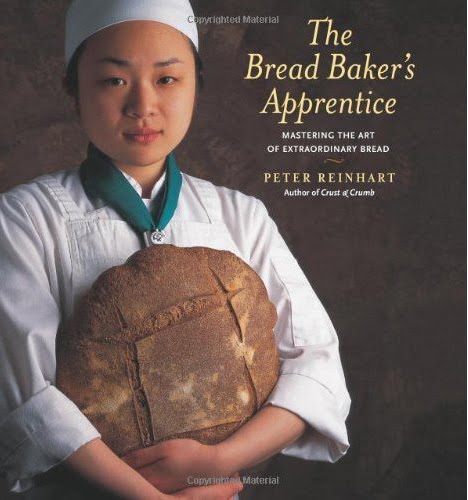
Last, "The Bread Baker's Apprentice" by Peter Reinhart is terrific. It doesn't get to the recipes until page 104. All the pages before that are packed with information. Where most books give one or two pages to technique and ingredients, this book has a chapter devoted to it, making sure to fully inform you of what to use and why, without being snobby. A little steep for my budget, but $35 is not bad for its size and length of information.
From these books I look for the knowledge and wisdom of the great breadmakers that have come before me. I shall document all interactions with them as they come.
BREAD DAYS
Every Monday will be devoted to either a new recipe or the perfection of a technique. I hope that by writing about my experiences, what I have learned will solidify and it will keep me accountable. So, here it goes. On February 28, I start my official journey with bread.
With bread,
~Chad
Subscribe to:
Comments (Atom)